

Doorbells have been around since the Victorian Era, originating with twist doorbells and pull doorbells. In 1831, Joseph Henry created the first electric one. Doorbells have come a long way since then, with options for wired, wireless, or even video doorbells available on the market now.
Video doorbells make it easy to keep an eye on your front door. They can even directly alert your phone if the camera’s sensors are triggered.
We’ve put together a tutorial for installing both battery-operated and hardwired doorbells, as well as video doorbells. We hope this guide gives you a better understanding of how doorbells work and gives you the confidence to tackle installation yourself.
Understanding a Wired Doorbell System
Knowing how to install or remove a doorbell is helpful if you need to upgrade it or fix a minor issue. Doorbells come in two types: wired and wireless.
When wired, they connect directly to your home’s electrical system. A wireless system is battery-powered, running off radio frequencies that transmit from the receiver.
The main components in a doorbell system include a push-button, chime, and transformer.
How does a wired doorbell get power?
The doorbell chime operates on a low voltage through your transformer. The transformer takes the standard electrical voltage, usually around 110-120 volts, and lowers it to approximately 10-24 volts.
Both wired and wireless doorbells convert electricity to the bell when someone pushes the button.
If you’re looking to install a camera doorbell, you may need to upgrade your transformer since those types of doorbells tend to require 16-30 volts of power.

How to install a doorbell button?
Traditional doorbells typically have two profiles: one with a hole in the back and one that sits flat against the doorbell’s siding. The best way to figure out which one your doorbell can use is to check your current doorbell.
Turn off your circuit breaker and test the wires with a multimeter to ensure it’s off.
Remove the screws holding the doorbell to the wall. If the screws are hidden, you may need to remove the plate first.
Using a screwdriver, carefully separate the screws holding the wires in place and disconnect the wires from the push button.
Use a piece of tape to tape the wires against the wall if it seems like you might lose them behind the siding.
Now it’s time to install the new doorbell button. Make sure you mount it flat, without gaps.
Find the wires that will attach to the new doorbell button. Put them back underneath the screws on the new doorbell. Locate the external cables and attach them to the push button.
Place the new button against the wall until you can’t see the wires, and re-attach the screws to secure it.
Replace the cover over the push button, if your doorbell has one, then screw it in place.
Switch your breaker back on and check that the doorbell button is working.
How to install a wired doorbell chime?
The doorbell chime is an integral part of your doorbell system. Once pushed, it alerts you that someone is at your door by sounding a chime or ring. If you have a house with square footage, you will want more than one chime unit.
Doorbell chimes can be found:
In the living room, against the wall.
Near the dining room, front hallway, or kitchen.
In a stairwell.
Once you’ve located the chime’s location, make sure your voltage can support your new doorbell.
Then turn off the power at your circuit breaker. (Tip: You can locate the breaker box in either a pantry or kitchen in your apartment or the basement or garage in a larger home.)
Remove the cover from the chime. Chimes typically have three screws: “front” screws for the front of the doorbell, “trans” screws for the transformer, and “rear” or “back” screws if your home has a doorbell in the back
Once you remove the cover, you’ll see a panel with several screws pinning different wires down: “front,” “back,” and “rear.”
Loosen the screws and disconnect the “front” wire, then do the same with the “trans” and “rear” wires.
Remove the screws holding the chime in place. Pull gently, making sure to thread the wires through the back of the chime.
Pro Tip: Tape the wires carefully to the wall to prevent them from sliding back into the wall.
Now you’re ready to install the new chime!
Carefully remove the taped wires, feeding them into the new chime.
Use each screw to mount the new chime unit to the wall and tighten the screws for a secure fit. If you used the tape method, make sure to remove the tape after tightening each screw.
Place the cover on the chime.
Turn the breaker back on and make sure the chime is working in both the front and back doors (if applicable).

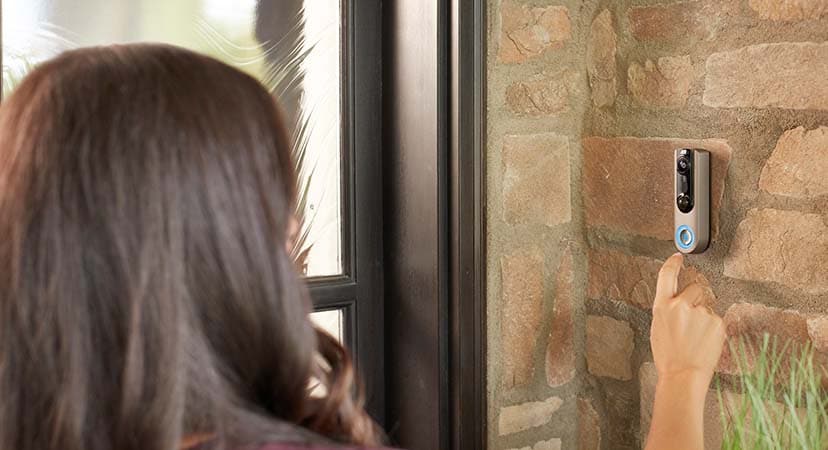
How to install a video doorbell?
Video doorbells help provide added security and peace of mind, allowing you to take advantage of both video and audio abilities so you can see and speak with visitors or package delivery drivers.
Below are some tips to help you set up a smart doorbell system.
Make sure that your video doorbell is charged before you install it.
Install the corresponding app and log into your account before starting the rest of the installation process.
Is your smartphone compatible with your doorbell?
Once connected, you should be able to connect to the doorbell via your home’s Wi-Fi connection.

What are some pros and cons of wired doorbells?
When deciding on a wired or wireless doorbell, there are some things to consider. Understanding the pros and cons of each system can help you figure out which plan is right for you and your family.
Pros:
Since the signals are passing through wires, they don’t interfere with radio frequencies.
Works regardless of internet connection.
Low maintenance.
Cheaper upfront cost.
Lots of options for different colors, shapes, or styles.
You don’t have to change the battery out.
Cons:
Installation can be complicated, sometimes requiring a professional.
Requires wiring and drilling.
When it does malfunction, you might be required to call an electrician.
Difficult to remove once installed, so you would need to purchase a new one when moving.
What are some pros and cons of wireless doorbells?
Pros:
Fewer wires or cables, or none at all. [Doesn’t require internal wiring.]
Can sync to your smart devices via Bluetooth.
Easier to install than a wired doorbell.
It can go with you when you move to a new home or apartment.
Easy to personalize the doorbell chime.
You can set up motion-activated alerts and receive live footage if someone is knocking on your door or dropping off a package.
Cons:
You need to be connected to the internet to view doorbell footage.
There is the potential for radio interference.
You need to re-charge or change out batteries.
More susceptible to extreme temperatures.
Usually comes in more traditional styles and colors.
Parts tend to wear out more quickly than wired doorbells.
At their most basic, video doorbells allow you to catch a potential package thief or see who is knocking on the front door. Thanks to newer technologies, you can even use 2-way audio to speak to anyone that comes to your door.
Besides smart video doorbells, wired and wireless doorbells are still popular options in many homes. And when you use a traditional doorbell in conjunction with outdoor home security cameras, you can still get many home security benefits.
ADT offers both DIY security camera systems with ADT Blu and professionally installed security camera systems to help give homeowners added peace of mind and greater visibility around their homes.

Let ADT do the doorbell wiring for you.
We hope this guide was helpful in giving you the knowledge to install or uninstall the components of a doorbell and its push-button, chime, or transformer. And if you’ve decided not to do the job yourself, we hope you’ll consider calling ADT.
With real-time footage streamed directly to your phone from the ADT+ app, ADT makes it easy to keep an eye on your front door.
Frequently Asking Questions about Doorbell Wiring:
What tools are required to wire a doorbell?
Standard tools include a power drill, or flathead, or Philips’s screwdrivers, as well as a voltmeter.
Where is the reset button on the ADT Blu doorbell camera?
The ADT Blu doorbell camera features a reset button on the back of the doorbell camera. Once you open the protective weather seal, you’ll see the red reset button, an on/off toggle, and a micro-USB port.
Related Articles:
