


This sensor works with Command security system.
Command Carbon Monoxide Detector
SiXCOA
Overview
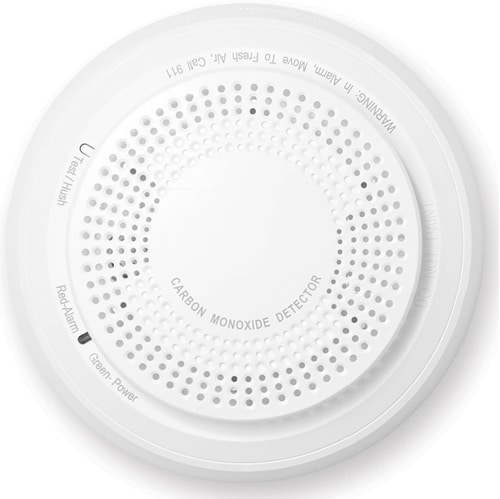
The ADT Carbon Monoxide Detector is an easy-to-install, battery-operated safety device with a sensor that detects carbon monoxide. When dangerous levels of carbon monoxide gas are detected inside your house, this device helps protect you and your family by sounding a loud alarm and by connecting to your ADT Command Security System, which provides communication to ADT’s monitoring center for emergency response notification.
Setup
If your Virtual Appointment has not been scheduled, please call (800) 493-7807. This product requires an ADT Virtual Agent to complete the connection of the sensor to your equipment. Your virtual agent will walk you through setting up your sensor.
Pre-Setup for Virtual Appointment
- Verify that you have everything you need to mount your CO detector:
- CO detector (included)
- Batteries (included)
- Note: Do not remove the battery tab until you are told to do so by your ADT Virtual Agent.
- Base plate (included)
- Two screws and anchors (included)
- Drill with drill bits for pilot holes (not included)
- Phillips head screwdriver (not included)
- Your Virtual Agent will walk you through where to place your sensor. Here are some things to consider:
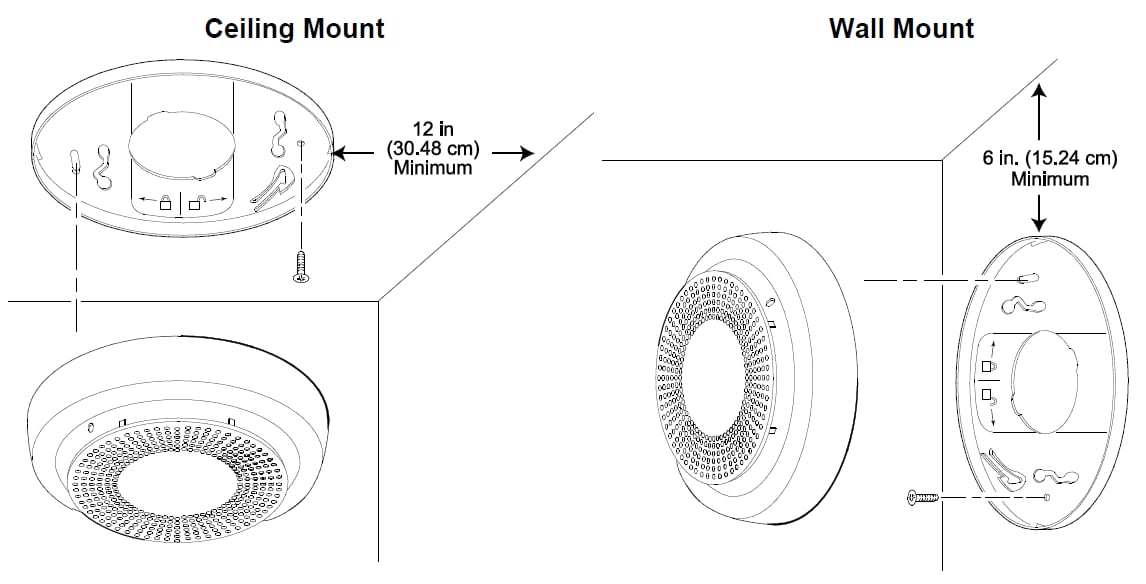
- Ceiling Mount should be a minimum of 12 inches from the vertical wall.
- Wall Mount should be a minimum of 6 inches from the ceiling.
- This device should not be located within 5 feet of any cooking appliance.
Congratulations! You are ready for the next step. Our Virtual Agent will contact you at your appointment time to complete the installation. We will connect your sensor to your ADT Command System so that it can be monitored. The virtual agent will verify the following:
✔ All test signals have been received.
✔ Your new sensor is labeled correctly on your touchscreen and in your Control app.
✔ If desired, notification settings are enabled, and notifications are being received on your device.
✔ Teach you how to best use your new sensor.
Setting up your Sensor
Your Virtual Agent will work with you to determine the best placement for your device. Once you have determined this, follow the steps below to begin mounting your Carbon Monoxide Detector.
Connect to the System
- Your Virtual Agent will advise you to remove the battery tab from the device.
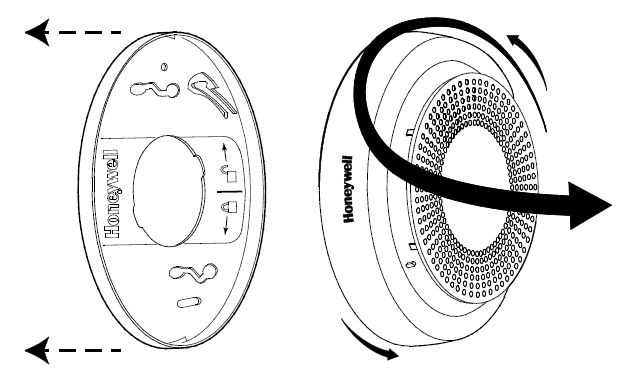
- Rotate the device counterclockwise to remove it from the mounting plate.
- Pull the tab to activate both batteries.
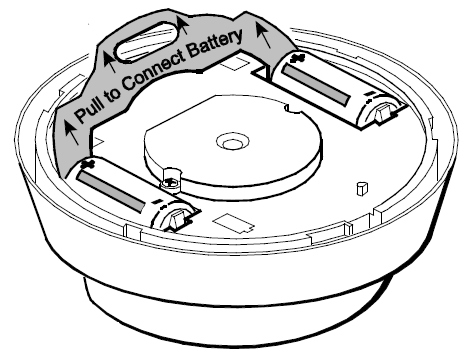
- The agent will then connect your device to the system. The LED light will flash rapidly while it is connecting to the system.
- The LED will flash green for 3 seconds when successfully connected.
Mounting the Detector
- Remove the detector from the base plate with a counterclockwise motion.
- Hold the base plate up to the ceiling or wall, mark the screw placement, and drill pilot holes.
- Attach the base plate using the two supplied anchors and screws.
- When mounted to the ceiling, position the detector a minimum of 12 inches from the closest vertical wall.
- When mounted on a vertical wall, position the detector a minimum of 6 inches below the ceiling.
- Fit the device onto the base plate, then turn it in a clockwise direction to fix it in place. Make sure it is securely attached.
- Your ADT Virtual Agent will now test the system and confirm all signals have been received by the ADT Central Station.
Features and Usage
Your Command Carbon Monoxide Detector helps keep your family, pets, and home safe.
Features
Electrochemical sensing
Capable of detecting low levels of CO.
Versatile mounting
Mount them on the ceiling or wall.
Tamper resistant
Built-in tamper switch communicates back to the control panel if a carbon monoxide detector is removed from its base.
Loud alarm
Alerts you when CO is detected in your home.
End-of-Life reporting
When the CO sensor has passed end-of-life, a trouble signal is sent to the controller (if programmed), which indicates when detector needs replacing.
Usage
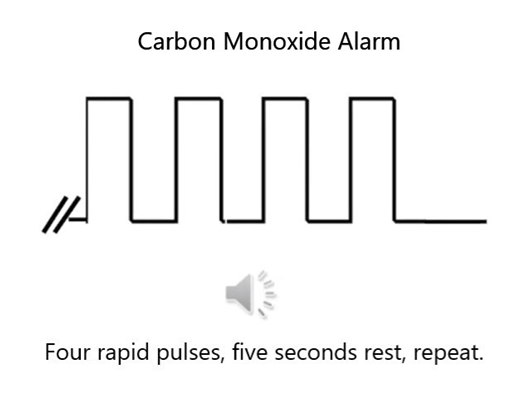
Alarm
If a CO alarm occurs at a device, this device will sound four rapid pulses, five second rest, then repeat. You should leave the house immediately.
LED Indicators
The SiXCOA has a multi-color top LED:
- Green = Normal; blinks green every 10 seconds
- Amber = Low battery; blinks amber every 45 seconds
- Red = Alarm condition; beeps four times
Silence Detector
Press the test/hush switch. The detector sounds again after 5 minutes if the alarm condition continues.
- In Alarm: the detector is silenced for 5 minutes. It will sound again after 5 minutes if the carbon monoxide is still detected. Note: if high levels of CO are present (>350ppm), the detector cannot be silenced. If the CO detector goes off, leave the house immediately.
- Low Battery: the detector chirping is silenced for 12 hours.
Note: The detector can only be silenced once per event.
Cleaning
It is recommended that you clean your detector periodically. To ensure that the holes on the front of the detector are not blocked with dirt and dust, gently clean the outside casing with a cloth.
Troubleshooting
Low Battery
A low-battery message for the detector can appear on the touchscreen or touchpad, and in the Control app.
- If you have recently changed the batteries verify that they were installed correctly. Refer to the Battery Replacement instructions below.
- If they have not been changed recently, it’s time to change the batteries in the sensor. You will need two CR123A batteries. To obtain new batteries, you can do one of the following:
- Log on to MyADT.com and select Orders to place an order or order batteries through chat with an agent.
- Call (800) ADT-ASAP to order batteries.
- Purchase batteries from an online or local retailer.
- Follow the Battery Replacement instructions below. Once the batteries have been replaced, the error message will no longer appear.
Battery Replacement
Two 3V CR123A
To replace the batteries:
- Log into MyADT.com and place your system on Test. To have an agent place the system on test for you, go to ADT.com and click Live Chat or contact (800) ADT-ASAP
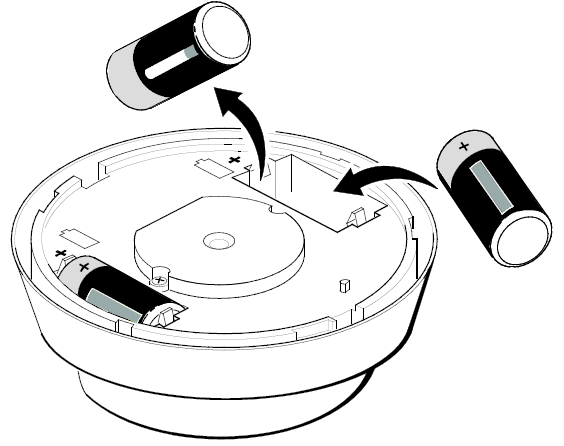
- Remove old batteries.
- Your panel will show a tamper signal and beep; this is normal.
- Wait 10 seconds.
- Replace with two new batteries. Note: To avoid a low-battery indication when installing new batteries, both batteries must be installed within 15 seconds of installing the first one. Any low-battery condition that may have occurred should clear when the base plate is installed.
- After re-mounting the device, go to the panel. Then, tap the icon in lower right corner and enter your code (this process is done twice).
- Remove your system from Test.
NOTE: Constant exposure to high or low temperatures or high humidity may reduce battery life.
BATTERY CAUTION: Risk of fire, explosion and burns. Do not recharge, disassemble, heat above 212° F (100° C) or incinerate. Dispose of used batteries properly. Keep away from children.
Detector End of Life
When the CO sensor has passed end-of-life, a trouble signal is sent to the Command panel. This indicates that the CO sensor inside the detector must be replaced.
If unresolved for 30 days, the detector will chirp every 45 seconds. It is recommended that you periodically check the “Replace by” date located on the label on the back of the detector head.
Once the detector has reached end-of-life, contact ADT for assistance. Log on to MyADT.com to chat with an agent, or call (800) ADT-ASAP.
An ADT technician who will assist you during your call. The Virtual Agent will verify the following:
✔ All test signals have been received.
✔ Your new sensor is labeled correctly on your touchscreen and in your Control app.
✔ If desired, notification settings are enabled, and notifications are being received on your device.
✔ Teach you how to best use your new sensor.

